AirDrop lets users wirelessly send files between Apple devices. Because it uses Bluetooth technology, it relies on devices being in close physical proximity to each other. It’s a handy way to quickly share files, photos, etc. without the need to draft an email or message. Plus, AirDrop files are encrypted, so it’s also secure.
Make sure you follow these steps beforehand so that you’re good to go:
-
Turn on Bluetooth and WiFi. You do not need to be connected to a WiFi network but the WiFi setting does need to be on. Also, turn off your hotspot if it’s on. AirDrop won’t work otherwise.
-
Make sure that the devices are within range of each other — no more than about 30 feet apart.
-
Check the AirDrop sharing settings of the device that is receiving the file. The settings are “Receiving Off,” “Contacts Only,” or “Everyone.” If you choose to only receive files from contacts, make sure that the owner of the device sending the file is saved as a contact. You can adjust these settings in your Control Center or by going to “Settings” > “General” > “AirDrop.”
How to AirDrop from iPhone to Mac
Open the file that you want to AirDrop, then tap the share icon, which is the square with the upwards-facing arrow.

Credit: Apple
That will show you all of the ways you can share a file. Tap the AirDrop icon, which is the concentric circles with a triangle cut out at the bottom.

Credit: apple
From there, select the user/device that you’d like to send it to. Tapping the user/device automatically starts the AirDrop process. If no devices are showing up, double-check that all of your settings are correct.

Credit: apple
To accept an AirDrop on your Mac, a preview window will pop up on your device asking you to accept or decline the transfer. If you accept the AirDrop, it will show up in the same app it was sent from (a photo sent via AirDrop will show up in your photos app.)


How to AirDrop from Mac to iPhone
There are a few different ways you can share a file via AirDrop on a Mac.
1. From Finder
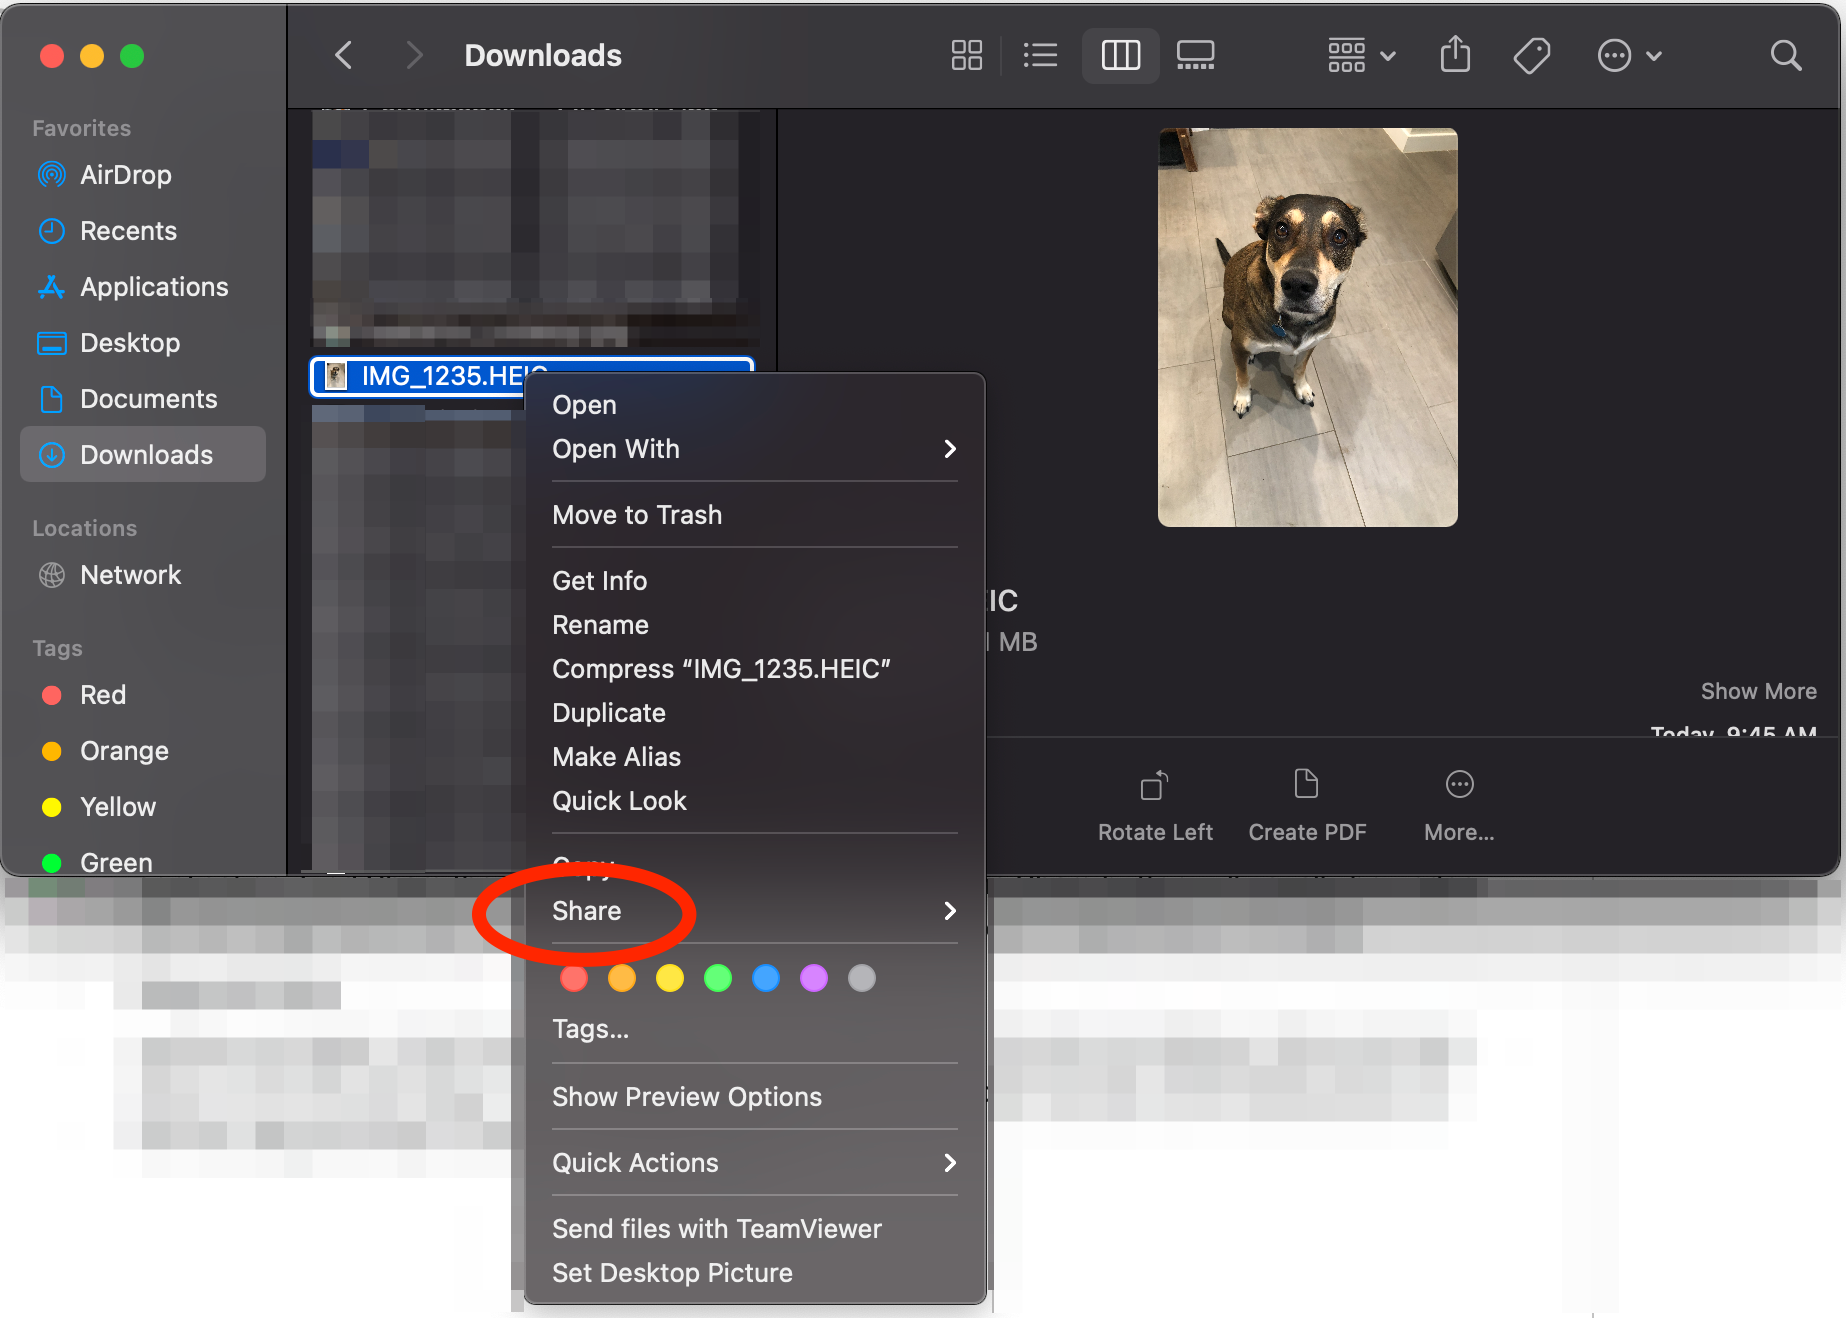
Locate the file you want to share. Instead of opening it, control-click/right-click on the file. In the dropdown, go to “Share” then choose AirDrop from the menu.

Credit: apple

Credit: Apple
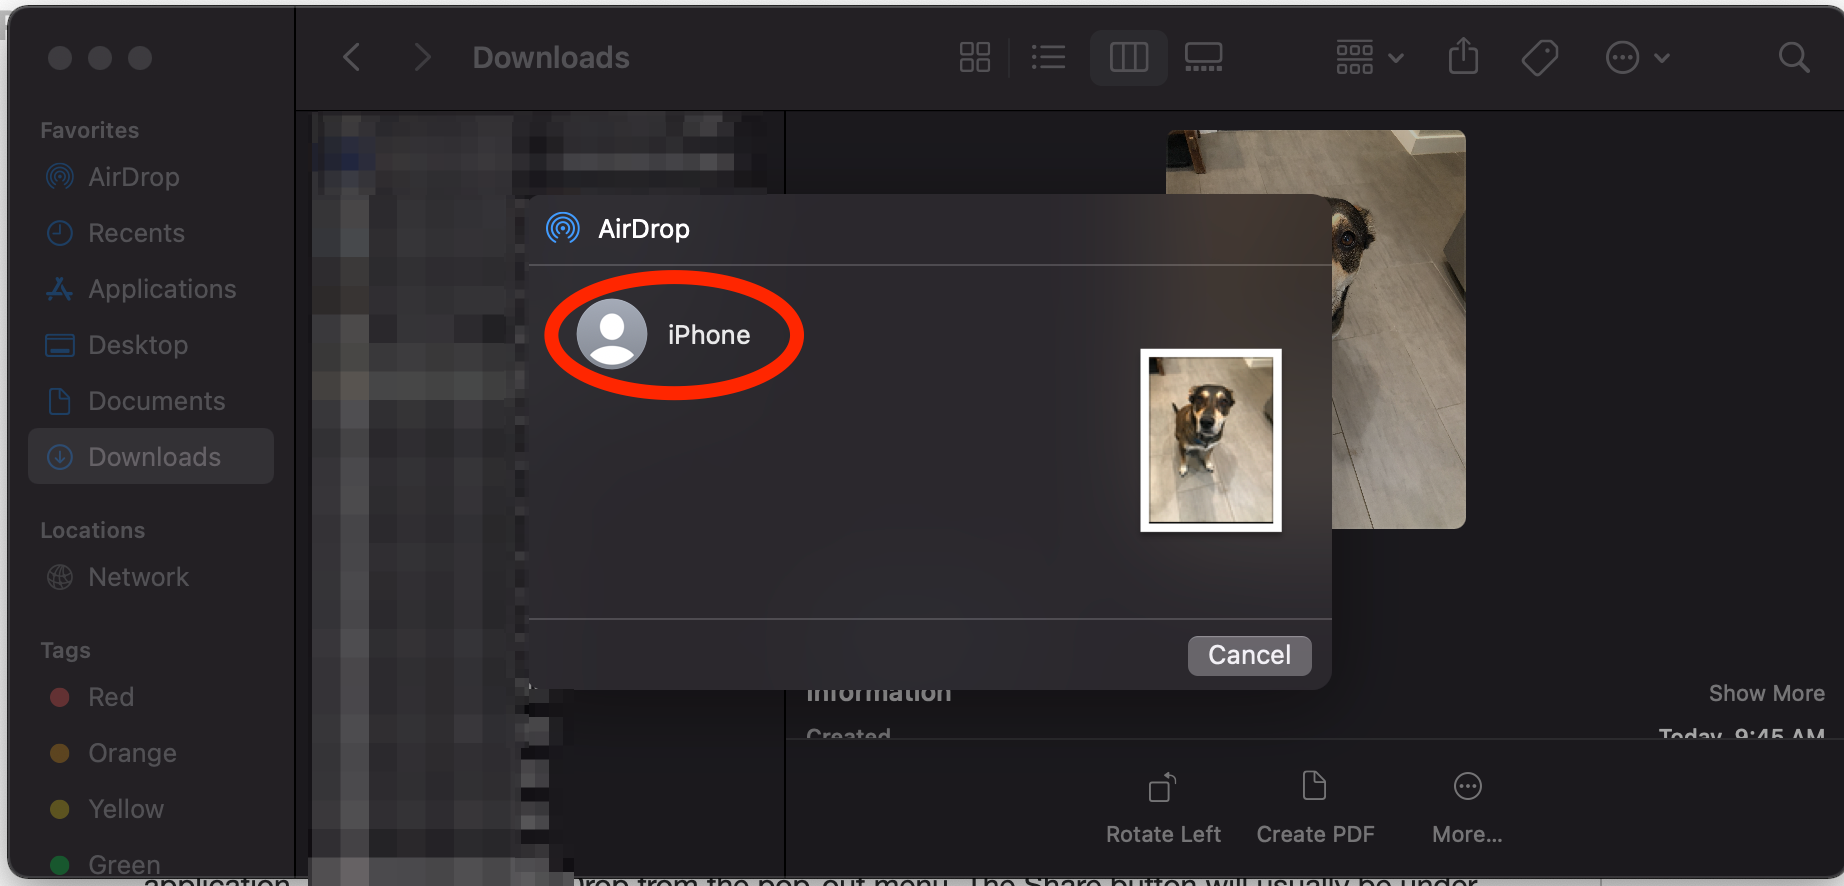
When the AirDrop window pops up, select the device to which you want to share.

Credit: apple
2. From the open file
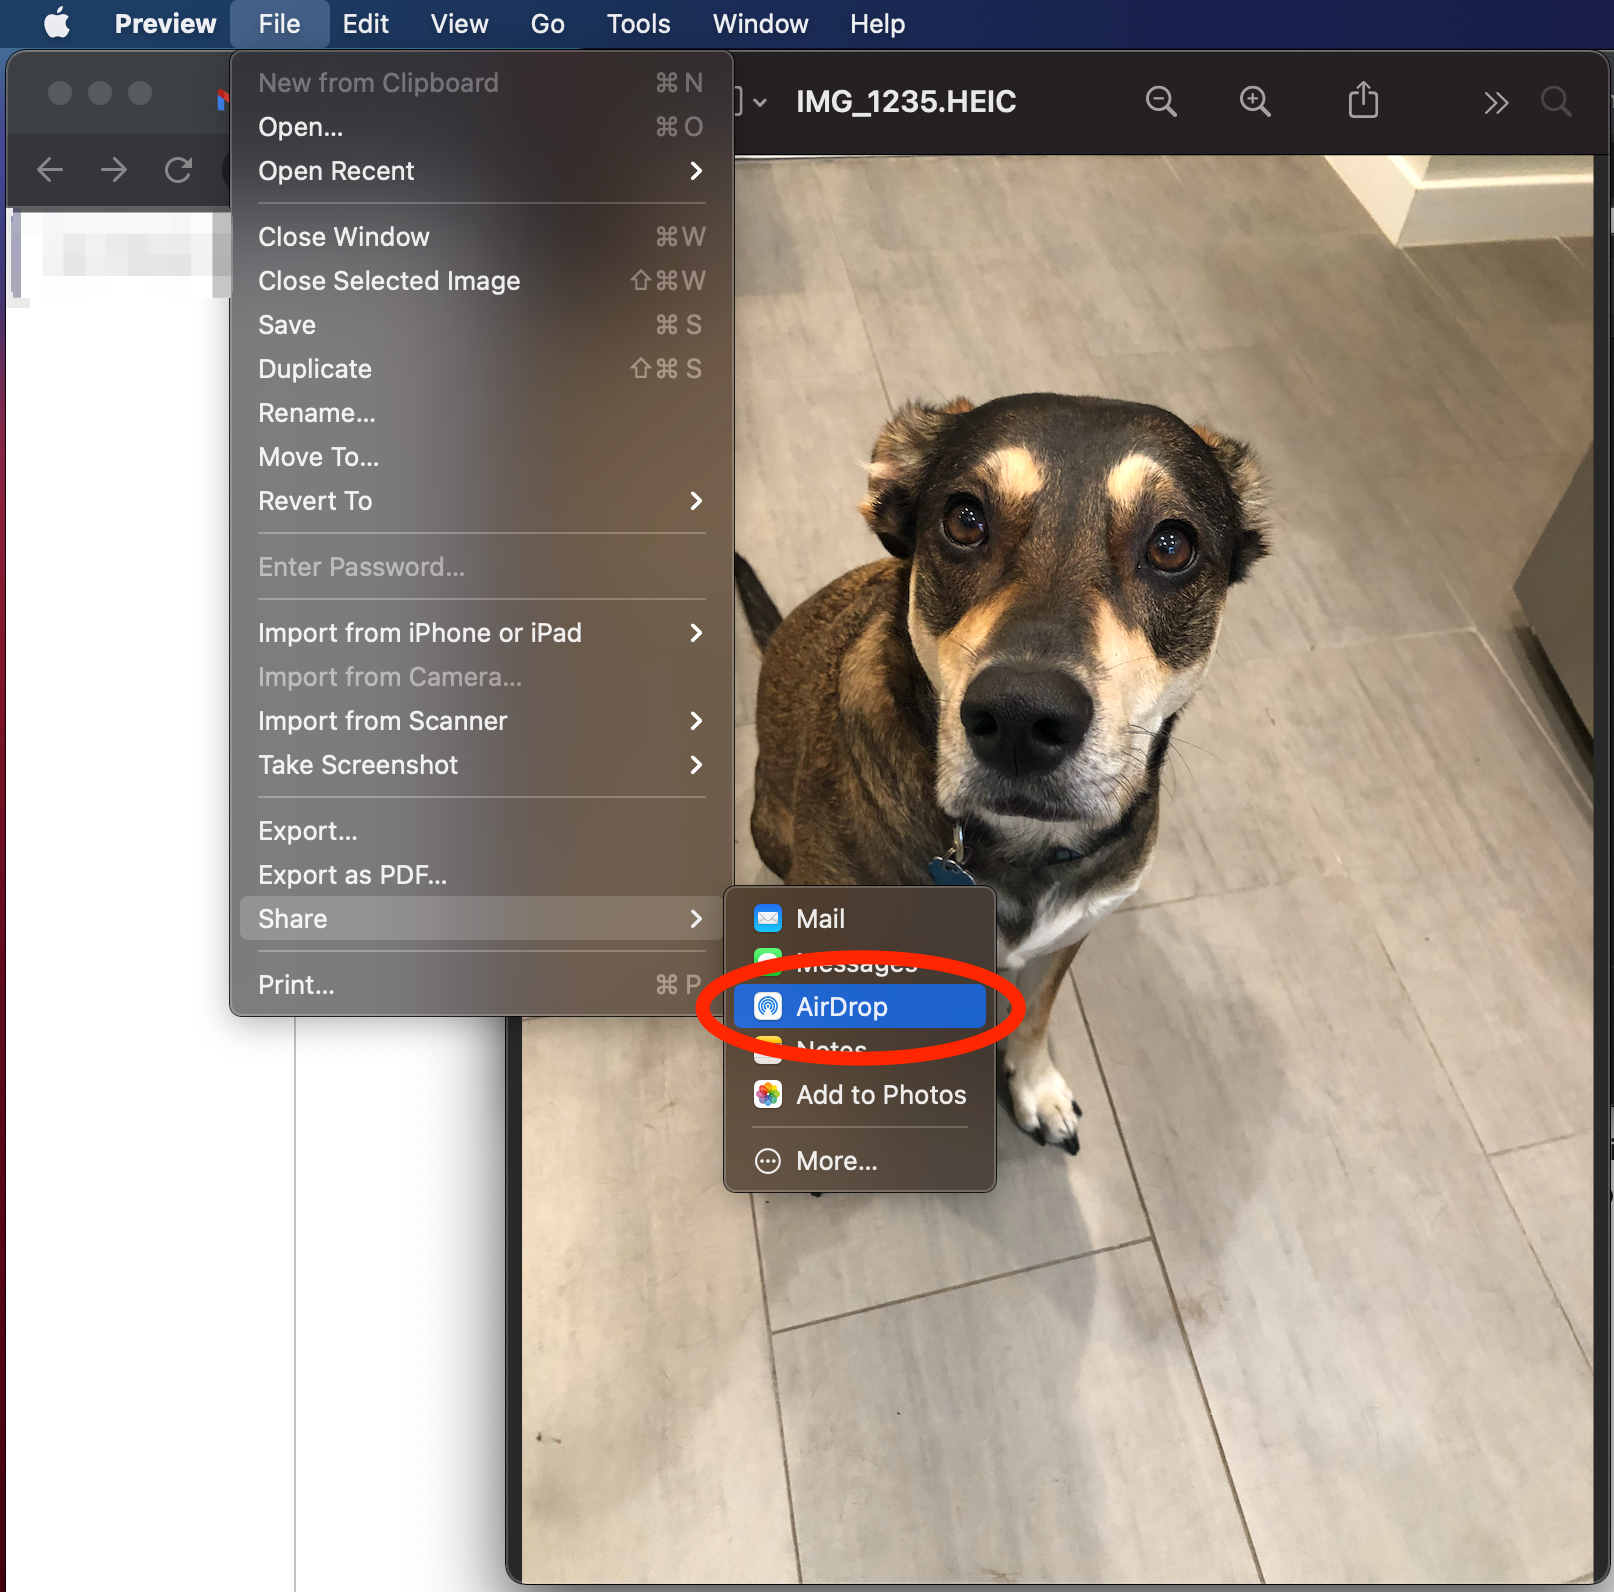
If the file that you want to share is already open, you can AirDrop from the toolbar of the open application. Find “Share” then AirDrop from the pop-out menu. The “Share” button will usually be under “File,” but might be its own section in the Toolbar or in another section, depending on the app.

Credit: Apple
3. Drag and drop
Last but not least, in the “Finder” window, you can drag and drop the file into AirDrop. Click and hold down on the file and drag it into the AirDrop section located under “Favorites.” Still holding down on the file, drag and drop it over the receiving device.

Credit: apple


